
A dash cam is one of the first, if not the first gadget you should buy for your car. It stays on your windscreen and keeps an eye on the road in front of you, or behind you for that matter. In case something happens, it’s your best witness. You can easily use it to prove that the accident you’ve been in may have not been your fault.
However, only a few manufacturers at the moment will give you a dash cam as a factory fit option, so you’re pretty much left to install one yourself. Fortunately, there are a lot of options for buying one, and installing it is also fairly easy if you know what you’re doing.
There are a few main ways to go about it, and we’ll touch upon all of them in order for you to have some options. You may also read the best dash cam under 100 here. So, without wasting any more of your time, let’s go.
The first way of installing a dash cam is to use its own battery
There are some dash cams that come with their own batteries you can use. Depending on the manufacturer and model, these batteries could be small or could be large, but one thing is universally true – they don’t last a lot. They’re actually only good if you use your camera for short trips. And to make matters worse, if you’re out of battery in the event of a crash, your camera is pretty much useless.
The next option is either your lighter socket, or a USB port in your vehicle
This is very well the most popular solution nowadays. Whether you opt for the lighter socket, or a USB port, you’re getting power as long as your vehicle is running. However, not everything is ideal here. To begin with, you’ve got a long cable hanging around in your car. Now sure, there are some dash cams that have a cable long enough for you to route it along the head lining’s edge, but not all of them are like that.
Also, depending on what port you use, you’re either going to have your lighter port occupied, or a USB port and both of them might be handy in a variety of situations. Oh, and there’s also the fact that the camera receives no power while your vehicle isn’t running, so you can pretty much forget about parking mode.
The last (and possibly best) way to go is to hardwire it
Why is it the best? Because you’ve got no unsightly cables hanging anywhere, you’ve got no necessary ports that are occupied by the camera, and the camera starts recording as soon as you start the car, which is ideal. So, how do you achieve this?
To begin with, you’ll need a hardwire installation kit. You can check our learning guide on how to hardwire a dash cam. With it, you’ll get a cable that splits into two at one end. One of the ends goes into the fuse box, while the other is either a ground lug or a metal ring that you’ll attach to your car’s metal body, and will ground the camera.
Now, the camera should be positioned well before you get started, ideally as close to the rearview mirror as possible. This gives you a good field of view of what’s ahead but doesn’t get in the way. Also check your local laws, as some states have regulations as to where you can, and cannot place a windscreen camera. When you set up the camera, start tucking in the cable between your windscreen and the roof lining. Once you get to the A-pillar, start guiding it down the side of it. Now, this does depend quite a bit on your vehicle’s make and model, but generally speaking, you should have enough space between the dashboard and the panel that covers the A-pillar to tuck the cable in neatly.
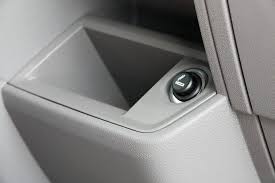
At this point, you should already be reaching the passenger footwell. On many cars, this is where you’re approaching the fuse box. It’s either inside, or beneath the glovebox, or behind a plastic panel, you can remove in the left or right footwell.
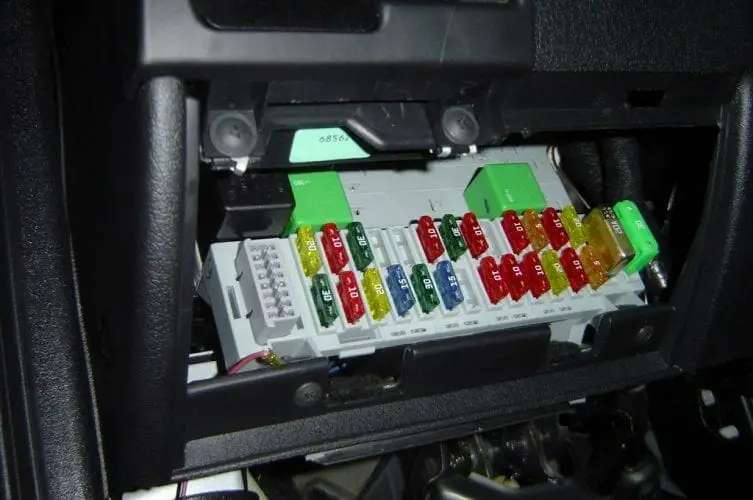
This is where you have a tricky situation. You will need a fuse that isn’t “always hot”, but instead “hot in start”. The first type is a fuse that always gives power to anything connected to it, and will drain your car’s battery very, very quickly. The “hot in start” fuses will only get power when you turn the ignition, but when it’s off, there’s no power. You can use a circuit tester to determine which socket you need, or you can simply go for the cigarette lighter fuse. Remove it, fit it to the plug of the hard-wire kit, and then fit it back into the fuse box. This way, both the camera and the lighter will get power from the same socket.
Last but not least, you need to ground the dash cam. This is done by finding a nut and bolt that are directly connected to a metal body panel. There should be a few to the fuse box. Undo the bolt, hook the ground lug or metal ring over the nut, and screw the bolt back on.
When you’re done with this, the only thing that remains is to turn the ignition and test whether the camera powers up, and shuts off when you turn off the ignition. Provided everything works as intended, use cable ties to tidy up any excess cable if you have it.
Finishing things up
Even though it might sound too complicated, as long as you can easily find the fuse box, and you can access it without needing to break anything, you should have the entire process done in no more than 30 minutes.
When you consider the importance of a dash cam, and how good it is not to worry about occupied ports or batteries that may not be charged, knowing how to install a dash cam is actually pretty useful.
Before we end this, you may be interested in reading our Auto VOX-v5 mirror dash cam review! You’re welcome, and see you all on our next article!
